Travelling to another country being a student can be stressful; That too travelling during COVID-19 period is crazy. Starting from the documents needed for applying the Visa till those extra documents that needed to be check-listed before stepping inside the airport is stressful. And after reaching the country, if you are a tourist, you can very well enjoy the atmosphere of Chile. But, being an international student, the procedures that you need to complete will be hectic than you think. Other than that, Chile is a country with a lot of wonders. This country is famous for stargazing. If you love looking at the sky, then it is one of the countries you must visit.
Student Visa Requirements
The basic documents that you require for the applications are
- First and foremost, passport
- A formal passport size photo
- Acceptance letter from the University
- Grade-sheets, that includes your high school and college
- An apostilled Police Clearance Certificate (PCC)
- Medical Certificate (MC) that shows you don’t carry any contagious disease
- A cover letter giving answers to the following questions “Why do you want to pursue your studies in Chile? What course and in which university have you been selected for? Duration of the course and funding information”
A certificate of English exam might not be required because Spanish is the prominent language in Chile. I would like to mention that the embassy keeps updating the documents required for the Visa process. It is always best to cross check with the embassy via email. Click here for the website of the Chilean Embassy in India. The best time to apply for a Chilean Visa is at least two months prior to your reporting date of your university. For example: if your starting date of your university is March 15th, applying in the month of January is sufficient. Also, since it is pandemic time, there are certain documents that are needed to be check-listed before you travel. Documents like PCR test, Health insurance that covers for COVID.
Application
Once you have collected every document that is needed to start with the application, click here to initiate the application.
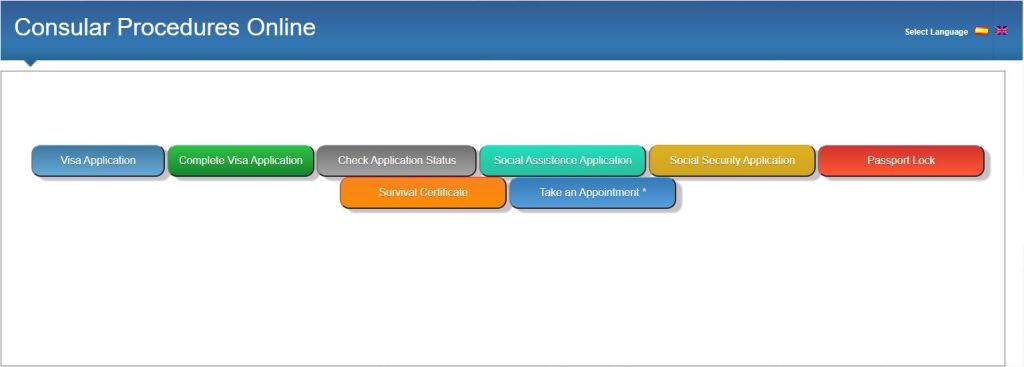
When you enter the website, the page will be similar to the above image, but in Spanish! Language can be changed to English at the right corner. For this application, you will be using only the first three tabs. To start with your application, enter Visa Application and fill in the required details asked. For a student Visa, you need to select “Residente Estudiante Titular”. If you have any queries while filling the application, do write in the comment section and I will try to clear your doubts.
Once you have submitted your Visa application, take a note of the Validation code using which you can check your Visa status in the same website by clicking “Check Application Status”. You will undergo a series of steps which takes quite a time to get approval of your visa. In case if any of your documents isn’t in the format of the embassy’s requirement, you will be informed prior before they start to proceed with your application.

When you are called for an interview, do not forget to take every original document that you have submitted in your application. from the moment you reach the Embassy and till you complete your interview will not take much time, maximum of 3 hours. So, if you are nowhere near Delhi and if you want to book flights or any other mode of public transportation, you can plan accordingly. It is not necessary that you need to stay a day to go for the interview. But, it is advisable to inform your time of presence to the embassy in advance. If you go to Delhi by flight, I would suggest that you take the metro considering the traffic in the city. It’s time-saving, if you ask me.
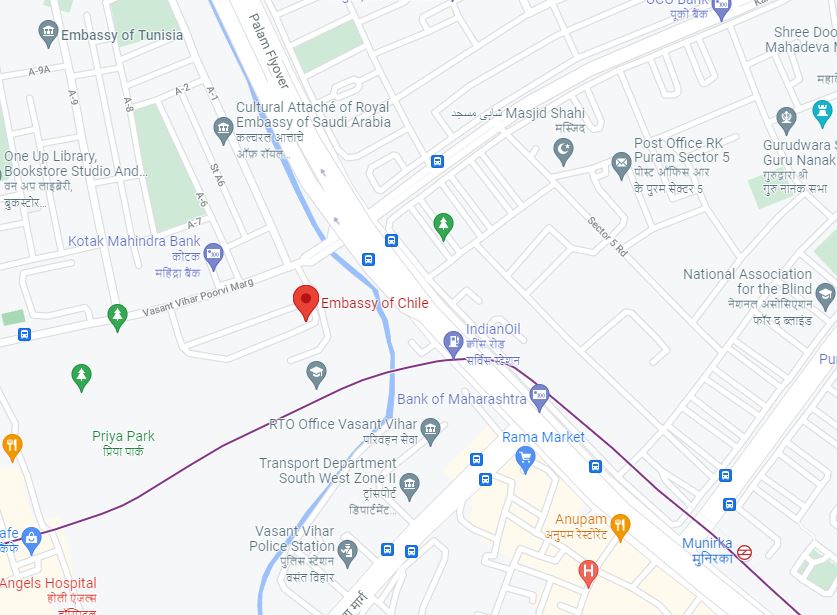
1s0x0:0x3ff20df8a3904a33!8m2!3d28.5606011!4d77.1681728
When you successfully complete your interview, after a few days you will be asked to pay for a Visa (For student’s visa, it’s around 8000 rupees and it changes every month. Ask the embassy for information). Payment is done by taking a DD and submitting it to the embassy directly. But, it is not necessary that the applicant should do this work. You can ask your friend or relative who lives in Delhi to make the payment and submit the DD in the Embassy. If you don’t have any personal contacts (friend or relative) who live there, you can contact an agent who does this service and pay them to do it. By doing this, you can save some of your time and money if you need to travel to Delhi for this purpose. In my case, since I applied during the pandemic (early 2021), there were several travel restrictions, so my friend did the payment on behalf of me. But in some cases, the embassy might ask a notary with the agent’s information saying that he/she is going to do this work on behalf of you. Again, communicate with the embassy and let them guide you.
Though they let agents make the payment, during the visa stamping they expect your presence at the embassy. So, if you are an outsider, your travel expenses and the time you spend travelling matters. If you are a person who loves to travel, you can go ahead and do all the process by yourself without the help of any agents.
Check lists to be noted once you have your Visa in hand:
Now, once your visa gets approved and stamping is done, you are almost there. There are few things that you need to be ready for and keep in mind before you leave the country.
-Mobile Phone: Normally when you visit another country, it is always important to check your phone frequency whether it matches the frequency bands available there. If it does match the right frequency, your mobile phone will not work in that country for their available sim card. Below is the frequency range that works in Chile.
2G – 850 MHz / 900 MHz / 1900 MHz
3G – 850 MHz / 900 MHz / 1900 MHz / AWS (1700-2100 MHz)
4G – 700 MHz / 2600 MHz / AWS (1700-2100 MHz)
If your mobile frequency does not come between the ranges, I would advise you to purchase a new phone and then start your travel. However, if you forgot to check this frequency range, it is okay to buy a basic model phone for the time being to make local phone calls and remember that you can always connect your smartphone using WiFi to skype chat or Voice call your family.
-Forex Card: Taking a multi-currency FOREX card is very handy in times like this. Especially for around 30 hours flight travel (India to Chile), it is essential to have a Forex card instead of taking cash with it. So, apply for a Forex card and load some amount of USD currency because there is no Chilean Pesos currency option in Forex. Also, before boarding from your flight convert some minimal amount of your currency to USD, just in case of emergency.
-Documents in hand: Some of the documents that you need to keep in hand would be your passport, your PCR test, your Travel/Health Insurance.
At this point, you are all set to leave for your destination. Hurray! If you think of using your time effectively, consider learning a few sentences in Spanish which will be very useful to you when you reach your destination. I suggest you use “Duolingo” to get used to the basics of Spanish.
Once you have reached Santiago, Chile:
Once you reach Santiago airport, everything you see there will be written in Spanish. Very few Chileans speak English. But don’t worry, Spanish is ‘little’ similar to English. Since the pandemic is still active, you might need to ask you to take a PCR test at the airport as soon as you land. If you’re not a big fan of undergoing that test, well I have two words for you all “Be Prepared!”. But the PCR test at the airport is free. After the test, they collect your details like “Your name, email ID, your address where you will be quarantined (to know whether you need to be in quarantine, check the guidelines of the country)“. If you are supposed to be quarantined after reaching Chile, you can either be quarantined in Santiago or in any other city (your final destination in Chile). They will inform you of the result of your PCR test either by Email or by contacting you. If you are vaccinated, you might need to be quarantined for less than 10 days. Also, this varies according to the COVID regulations of the country at that time of your arrival. *Important* : Remember to keep every piece of paper you have been given at the airport during immigration. It will be needed for the below mentioned process.
Your Identity card: Once you have settled (or completed your quarantine if you wanted to) in your residence, it is time to start your process to get an Identity card that says you are a temporary resident in Chile. It is called RUT (Rol Único Tributario). RUT is basically an identity card, an unique number given to every resident in Chile. Without RUT, you cannot start any procedures in the country. To buy a sim card or to open a bank account, everything needs RUT. In case of sim card, you can request a friend to buy it for you using their RUT. But it wont be needed as long as you can use WiFi at the place wherever you stay.
1. PDI: You will be needing a certificate from PDI in the city you are living. Click here to apply online to get the certificate. Fill the details and make a required payment. It might take three days and do not take more than a week to get your certificate via email.
2. RUT office: Once you got a certificate from PDI, take a print of of that along with a copy of your passport, visa and the Entry stamp-date in your passport to the nearby ‘Registro Civil‘ building. Submit your documents and you will be provided a RUN (Rol Único Nacional) number which is the same number as your RUT (format: xxxxxxxx-Z). Once you got your RUN, you can start using that number in the Supermarkets and get a sim card. But in order to open a bank account, you will be needing your RUT card! Which will take approximately 30 days.
3. RUT card: When you get an email from “Registro Civil” you can go collect your RUT card by showing your RUN. During this time, don’t forget to ask for a Clave única (Unique password) which will be used when you are applying for Visa renewal.
Mobile Registration: As per Chilean laws, when you buy a local sim card here in Chile, it is mandatory that you should register your mobile IMEI number within 30 days after you insert the sim card. There are many sim cards available, but I recommend you to choose either Movistar or Entel from my personal experience. Click here to register your IMEI number.
To open an account: Using your RUT card, the fastest way to open a bank account is “CuentaRUT” in ‘BancoEstado’. You can fill out the application an submit online. Once you got the confirmation, you can go to the bank directly showing that particular email from the bank and collect your card. When you go to the bank to collect the card, remember to ask them for internet banking. They provide you the respective details and a key card which you will be using for every online transactions you make.
Lastly, I wish you a safe trip. Try to experience the thrill of moving to another country that has a different culture and language (if these are new to you). Most of all, if you are an extrovert, try to socialize with people by one-arm distance 😉
(If you find difficulties during this whole experience, drop a comment. I will be glad to help you through it)

Is there any link I could follow the COVID regulations in Chile?
LikeLiked by 1 person
Hi. You can refer this following link: https://www.chile.travel/en/traveltochileplan/
LikeLike